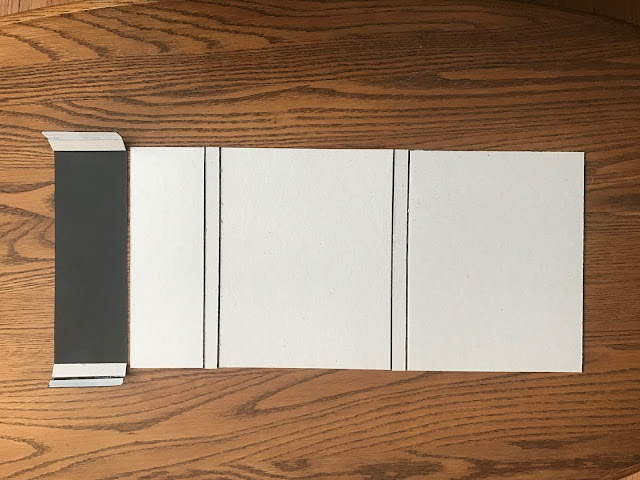
I created a book for this stationary set. To make this book cut 2 pieces of chip board at 7x9 inches. Cut two at 1/2 x 9 inches and one at 3 x 9. Cut two spacers at 1/2 by 3inches. Hinge a piece of 3 x 9 inch black cardstock to the two 1/2 by 3 inch pieces. Attach all pieces with paper hinges as shown below.
Flip the black cardstock over the first piece of chipboard as shown below and hinge it down with score tape. This gives you a pocket to hold your envelopes.
This is what it should look like below when you are ready to cover it with the Sweet Peony Paper Collection. From here you can flip it together so it is a book with a pocket inside.
Cover Instructions: Glue ribbon to the front and back of the chipboard before covering with paper. Find the full sheet of paper with the birdhouse and fence on it and cut it 6 1/5 x 7. Glue to front cover. Find a second full sheet with the pink peony's and purple flowers on for the back . Cut and glue as you did on the front. Cut and glue a black binding to the book. Cut a 1/2 inch strip with the tiny peony's on it and glue to the binding. I applied some gold outline stickers to the edge on the front and back. Cut and glue the lace border from the Sweetheart Border to the top of the front cover. Cut and glue the rounded medallion to the right edge of the book. Stamp and Color the scroll from the Sweet Lilac Scroll and Notes. Cut with matching die. Using the Small Sweet Peony stamp and color a few flowers in both sizes. Cut with matching die. Shape flowers using the 3D basics flower shaping mold. Finish shaping with stylus buy pushing down in the middle of each flower. Glue two flowers together for each flower. Glue three flowers on the scroll and a few flowers on top of the flowers on the paper. Add prills to the centers of the flowers.
Inside: Cover the base with the paper that has tiny peony's on it. Cover the pocket with a pink paper. Cut elements from the Window Box Elements. Glue two of the rectangle pieces to the pocket. Glue the two topper pieces close to the binding. Cut two of the pockets from the Fleur Borders and Pockets. Glue them on opposite corners of the left page to hold the paper. Cut 10 sheets of paper
6x8. Cut on piece of chipboard 5x7. Lay the chip board in the center of each piece of paper and draw a black line around it with a fine sharpie. Now mask inside the lines and stamp at random with the smallest peony flower. Add a bit of color to each flower. You now have beautiful peony stationary. Take 10 envelopes and stamp with the small peony to one corner of the envelope to match the paper. Make 3/4 inch belly bands and put around the paper and envelope. Tuck the paper behind the pockets and the envelopes into their pocket. Take a strip of paper and tape it together to place your pen in. Attach it to the inside binding.
Product Used
Sweetheart Borders Die HCD1-7161
Decorative Medallion Die HCD1-7144
Window Box Elements Die HCD1-7150
Fleur Borders and Pockets Die HCD1-778
Sweet Lilac Scroll and Cage Die HCD1-7172
Sweet Peony Collection HCDP1-288
Small Sweet Peony Stamp HCPC-3819
Small Sweet Peony Die HCD1-7173


No comments:
Post a Comment